

Android Working with Runtime Permission
Содержание
-
1 Android Working with Runtime Permission
-
1.1 Android Working with Runtime Permission
- 1.1.1 Android Runtime Permissions
- 1.1.2 Permission Types
- 1.1.3 Permission Workflow before and from M (API 23)
- 1.1.4 Check for permission
- 1.1.5 Explain why the app needs permissions
- 1.1.6 Request and Handle Runtime permission
- 1.1.7 Understand the workflow of runtime permission request
- 1.1.8 Creating Android Project
- 1.2 2. Permission levels
- 1.3 Targeting Android 8 and higher, continued
- 1.4 3. Request permission for sending SMS
-
1.5 Android Working with Runtime Permission
- 1.5.1 Android Runtime Permissions
- 1.5.2 Permission Types
- 1.5.3 Permission Workflow before and from M (API 23)
- 1.5.4 Check for permission
- 1.5.5 Explain why the app needs permissions
- 1.5.6 Request and Handle Runtime permission
- 1.5.7 Understand the workflow of runtime permission request
- 1.5.8 Creating Android Project
- 1.6 Targeting Android 8 and higher, continued
- 1.7 What’s Next?
-
1.1 Android Working with Runtime Permission
Android Working with Runtime Permission
Every Android application is started in its own process thus are isolated from all other applications (even from system/default applications). As a result, an Android application can’t access any file or data outside its scope until and unless the file or data is shared with the application.
So, the conclusion is that if an application needs anything outside its scope, then it has to request the appropriate permission.
Get Github code from HERE.
Android Runtime Permissions
- Runtime permissions are a new feature in Android 6.0 Marshmallow that allow you to request permissions at runtime, when it matters rather than at install time.
- This will give the user to have more control over the permissions and ensure more security for his/her confidential data.
- In the case we try to call some function that requires a permission which user has not granted yet, the function will suddenly throw an Exception (java.lang.SecurityException) that will lead to the application crashing. Hence we need to implement this new android permissions model in our application.
Permission Types
Permissions are divided into several protection levels. The two most important protection levels are normal and dangerous permissions.
- Normal Permissions
- Dangerous Permissions
Normal Permissions : Permissions that have very little or no effect on user’s privacy or confidential data are categorized as normal permissions. The system itself grants normal permissions when requested instead of prompting to the user. Examples would be ACCESS_WIFI_STATE, WAKE_LOCK, INTERNET , etc.
Dangerous Permissions : Permissions that may have a greater effect on user’s privacy or confidential data are categorized as dangerous permissions. Examples would be READ_CONTACTS, ACCESS_FINE_LOCATION, CAMERA , etc. If an app requests dangerous permissions then the user has to explicitly grant permission to the app.
Here is the detailed information about permissions.
Permission Workflow before and from M (API 23)
The permission workflow has been changed from Android Marshmallow(API 23). The way Android asks the user to grant dangerous permissions depends on the version of Android running on the user’s device, and the system version targeted by your app.
Permission Model before M (API 23):
- Before API 23, the permission model was simpler to the developer but offered less control and security to the user.
- If the device is running Android 5.1.1 (API level 22) or lower, or the app’s targetSdkVersion is 22 or lower while running on any version of Android, the system automatically asks the user to grant all dangerous permissions for your app at install-time.
 Install-time permission dialog
- If the user clicks Accept , all permissions the app requests are granted. If the user denies the permissions request, the system cancels the installation of the app.
- Permissions cannot be denied or granted after the installation.
- Thus developers were required only to declare all needed permissions in the manifest and then just forget, if the app is running then it has all the requested permissions.
Permission Model from M (API 23):
- With Android 6.0 Marshmallow (API 23), a new runtime permission model has been introduced.
- According to this model if the device is running Android 6.0 (API level 23) or higher, and the app’s targetSdkVersion is 23 or higher, the user isn’t notified of any app permissions at install time.
- Your app must ask the user to grant the dangerous permissions at runtime before performing any action that may require the particular permission.
- When your app requests permission, the user sees a system dialog which includes a Deny and Allow button.
- If the user denies the permission request, the next time your app requests the permission, the dialog contains a checkbox that, when checked, indicates the user doesn’t want to be prompted for the permission again.


Note: According to Google, beginning with Android 6.0 (API level 23), users can revoke permissions from any app at any time, even if the app targets a lower API level.
Check for permission
If your app needs a dangerous permission, then you must check whether you have that permission or not every time when the app performs an operation that requires that permission.
For example , if your app uses the camera feature, then you have to check for the camera permission every time when app opens the camera.
To check if you have a permission, call the checkSelfPermission() method. For example, this snippet shows how to check if the activity has permission to access the camera and location:
If the app has permission, then the method returns packageManager.PERMISSION_GRANTED (ie. 0) and the app can continue with the operation.
If the app does not have permission, then the method returns packageManager.PERMISSION_DENIED (ie. -1) and the app have to explicitly ask the user for permission.
Explain why the app needs permissions
In some circumstances, you want to help the user understand why your app needs a permission.
For example , if you write a camera app, requesting the camera permission would be expected by the user and no rationale for why it is requested is needed. If however, the app needs location for tagging photos then a non-tech savvy user may wonder how location is related to taking photos. In this case, you may choose to show UI with rationale of requesting this permission.
Android provides a utility method, shouldShowRequestPermissionRationale() , that returns true if the user has previously denied the request, and returns false if a user has denied a permission and selected the Don’t ask again option in the permission request dialog, or if a device policy prohibits the permission.
Request and Handle Runtime permission
When your app receives PERMISSION_DENIED from checkSelfPermission() , you need to prompt the user for that permission. To request the permissions Android provides a method called requestPermissions() to request array of permissions to be granted to the application and these permissions must be requested in your manifest. Calling these methods brings up a standard Android dialog, which you cannot customize. When the user responds to your app’s permission request, the system invokes your app’s onRequestPermissionsResult() method, passing it the user response.
Request runtime permission
- If your app doesn’t already have the permission it needs, the app must call one of the requestPermissions() methods to request the appropriate permissions.
- Your app passes the permissions it wants and an integer request code that you specify to identify this permission request.
- This method functions asynchronously. It returns right away, and after the user responds to the prompt.
- The system calls the app’s callback method onRequestPermissionsResult() with the results, passing the same request code that the app passed to requestPermissions() .
The following code checks if the app has permission to access CAMERA . If it does not have permission it checks if it should show an explanation for needing the permission, and if no explanation is needed, it requests the permission:
Handle the permissions request response
- When the user responds to your app’s permission request, the system invokes your app’s onRequestPermissionsResult() method, passing it the user response. Your app has to override that method to find out whether the permission was granted. The callback is passed the same request code you passed to requestPermissions() .
For example, if an app requests CAMERA and LOCATION access it might have the following callback method:
- If the user denies a permission request, your app should take appropriate action. For example, your app might show a dialog explaining why it could not perform the user’s requested action that needs that permission.
- When the system asks the user to grant a permission, the user has the option of telling the system not to ask for that permission again. In that case, any time an app uses requestPermissions() to ask for that permission again, the system immediately denies the request.
Understand the workflow of runtime permission request
- When the app asks for dangerous permission for the first time, then the system shows a standard non-customizable dialog that specifies the permission features.

- If the user denies permission and the app tries to access the same permission again then it is a good programming practice to show an explanation to the user that why the app needs that permission. This is not a system dialog but showing explanation is the responsibility of the user.

- If a previously denied permission request again, then the system shows a standard dialog with an additional checkbox (Don’t ask again) .
- If the user selects the checkbox(Don’t ask again) then the system will never show that permission dialog again.

- If the user selects the checkbox(Don’t ask again) and denies the permission for the second time then it is a good programming practice to lead the user to the permission page in app settings to grant the denied permissions.


So now let us start with creating a sample app.
Creating Android Project
1. Create a new project in Android Studio from File ⇒ New Project and fill the project details.
2. Open build.gradle (app level) and make sure that you have set minSdkVersion and targetSdkVersion as we have to support the permissions model in lower versions also. I am keeping minSdkVersion to 17 and targetSdkVersion to 28.
build.gradle
3. Though we will request the permissions at runtime, we should add it to the Manifest also. We will start with the CAMERA and ACCESS_FINE_LOCATION permissions. Add these permissions to your AndroidManifest.xml just before the application tag.
AndroidManifest.xml
4. Open the layout file of main activity (activity_main.xml) and add the below xml. This layout contains two buttons ie. CHECK PERMISSION to check the permission and REQUEST PERMISSION to request the permissions.
activity_main.xml
The above layout generates a screen something like this.
Now you have an idea about the Android permission, let’s see how to ask for the permission in Android.
To ask for permission in Android you have to follow two steps:
1. You have to add those permissions requests in project -> app -> src -> AndroidManifest.xml file.
For Example, if we want to ask for the Camera Permission we have to add the following permission request in AndroidManifest.xml

After adding the permission in AndroidManifest file, this permission will be automatically asked by the play store when they install the app and this permission will be granted to the applications.
On devices before SDK version 23, the permissions are automatically granted if we add those permissions in our Androidmanifest.xml file but after SDK version 23 you have to ask runtime permission as well. If you are targeting the Android version dangerous permissions in run time (You don’t have to ask for all the permission just some permission which are called dangerous permissions, you can see the list below).
According to the official docs, dangerous permissions require a dialog prompt.
So whenever you are working with this dangerous permissions you need to check whether the permission is granted by the user or not and that can be done with the help of PermissionsAndroid in React Native.
For example, If we need INTERNET permission and CAMERA permission then we have to add both the permission in AndroidManifest.xml file but have to ask only for the CAMERA permission in run time because CAMERA permission comes under the dangerous permission not INTERNET permission.
Here is the list of dangerous permissions.
2. Permission levels
System permissions have different protection levels. The two most important protection levels are normal and dangerous permissions.
Normal Permissions: Those permissions which will have very little or zero effect on users privacy or security are categorized as normal permissions. The system itself grants normal permissions when requested instead of prompting to the user. Examples would be ACCESS_WIFI_STATE, WAKE_LOCK etc.
Dangerous Permissions: Those permissions which may have a greater effect on users privacy or security are categorized as dangerous permissions. Examples would be the ability to read the user’s contacts READ_CONTACTS. If an app requests a dangerous permission, the user has to explicitly grant the permission to the app.
Here is the detailed information about permissions and their groups.
So now let us start with creating a sample app.
Targeting Android 8 and higher, continued
As per the last article, this article and demo was produced using Delphi Tokyo 10.2.3. The code may or may not work with earlier versions. NOTE: If you’re using Delphi 10.3 or higher, you should use the built-in support for permissions and external URIs.
UPDATE (July 20th, 2018): The demo has been modified to allow for a workaround for local notifications when targeting API 26 or greater. See below for details.
TL;DR: The demo code for this article can be found in the KastriFree project, here.
Targeting an API level
There has been some confusion over what “targeting” a particular API level means. It does not mean which Android SDK you have configured in the SDK Manager in the Delphi IDE. It means what value is set for the targetSdkVersion value in the application manifest:

This is the API level at which Android will act in “compatibility mode” for. By default, Delphi sets this value to 14 (Android 4.0). The device can still have a later version of Android installed, and your application can still use API calls that apply for the installed version, however it will act as if it were at the target level. For example, an app targeting API level 14 on a device running Android 6 will not require requesting permissions at runtime.
At present, to target a particular API level, you need to manually modify the AndroidManifest.template.xml file, as described in the previous article.
A change in the method for responding to runtime permission requests
In the previous article, I devised a method of requesting permissions at runtime that required “overriding” FMXNativeActivity in the manifest. Unfortunately, that meant having to launch the application from the device manually in order to debug via the IDE. Thanks to a suggestion from Stephane Vanderclock, author of the Alcinoe library, I’ve devised a different method that removes the need to “override” the activity.
Through necessity (which will become clearer later), I have created a new class called TPermissionsRequester, which more accurately reflects what it does anyway. This replaces the TSystemHelper class, which I recommend you stop using altogether, if you choose to change to using this new solution.
When a runtime permissions request is made, the focus moves away from the application, and once the user has granted or denied permission, the application receives focus again, and the BecameActive event fires. TPermissionsRequester handles this event, and if a permissions request has been made, checks whether such permissions were granted:
So all the developer needs to be concerned with is requesting the actual permissions, and handling the OnPermissionsResult event:
As TPlatformPermissionsRequester (in DW.PermissionsRequester.Android) uses TApplicationEventMessage which comes from the FMX.Platform unit, it cannot be used in a service (at least at present). That’s why TPermissonsRequester was created, and CheckPermission method has been moved to TOSDevice, so that it can be used in a service.
Note that in this demo, permissions are requested only when absolutely required (i.e. when the user wants to take a photo). This makes the application a little more user friendly than if the permissions were requested as soon as the application starts.
In the code, I am passing the string representation of the permission, e.g.
The format for all of the “dangerous” permissions is the same, i.e. it follows the pattern: android.permission.XXXX, where XXXX is one of the “Permissions” values in this list, so you can define your own values to be passed to the RequestPermissions method in the same manner.
Note that even though you’re requesting permissions at runtime, you still need to check the checkboxes for those permissions in the Uses Permissions section of the Project Options
Accessing “external” URIs
If you have tried to target API 26, and attempted to use the TTakePhotoFromCameraAction, you would have noticed that it fails, with the error:
android.os.FileUriExposedException: file:///storage/emulated/0/test.txt exposed beyond app through Intent.getData()
From Android 7.0 (API level 24), when accessing “external” URIs, it is necessary to use the FileProvider class. Unfortunately, the code that causes the problem for TTakePhotoFromCameraAction is actually within the Java binaries (FMX.jar) that Delphi uses, so rather than expect developers to patch and recompile FMX.jar, I’ve come up with an alternative solution.
TMediaLibrary is an alternative for (at least for the present), TTakePhotoFromCameraAction. I may or may not expand on it, depending on how useful it becomes, and how Embarcadero handle the required changes. It has a single method: TakePhoto, and has event handlers for when the image is captured successfully, or when the user canceled.
Also it is currently useful only on Android, as there are no implementations for the other platforms.
TMediaLibrary makes use of a function from the newly created unit DW.Android.Helpers, called UriFromFile. This method checks what the targetSdkVersion value is, and if >= 24 it uses the FileProvider class to create a Uri from the file reference, passing in the “authority” which needs to be specified in the manifest. This is done by adding a Provider section, like this:

When using the UriFromFile function, the value specified in the manifest for android:authorities will need to match the application’s package name. This value appears in the Project Options under Version Info.
Note the entry: . This is a reference to a file that needs to be deployed with the application, called (in this case): provider_paths.xml. This is what the file looks like:

This file needs to be added to the application’s deployment using Deployment Manager, and the Remote Path value set to: resxml

Remember that when targeting API level 24 or greater, your app will need to request the appropriate permissions at runtime (as per the demo), before attempting to use the TakePhoto method. I had considered making TMediaLibrary handle all this automatically; perhaps in the future You should also remember that there are a number of other “dangerous” permissions that may be used throughout Delphi (e.g. by TLocationSensor). Be sure to request permissions at runtime for any of those that require it, before you attempt to use them.
Remember also that the UriFromFile function can be used in your own code if your app needs to access “external” files. You will certainly know this is the case if your application throws the dreaded FileUriExposedException.
Taking care of the status bar
In the previous article, it had slipped past me that when changing the API target, the status bar was no longer visible!
In this demo, the workaround was to change the Fill property of the form, setting the Color to Null, and the Kind to Solid. In addition, a Rectangle is added to the form, the Align property set to Contents, and the Color property of Fill set to Whitesmoke. Now the status bar is visible again, however remember that this is just a workaround; hopefully an official solution will present itself in the next update.
Getting notified..
The demo has been updated (July 20th, 2018) to allow for a workaround for local notifications. In order for them to work however, you will need to patch the System.Android.Notification unit from the Delphi source. Details on how to do this are in the readme. Also, you will need to use new files added to KastriFree, namely:
Note also in the demo that the original android-support-v4.dex.jar is disabled. This is because the demo uses a newer version of the Android support libraries:

Are there other issues that need to be accounted for when targeting later API levels?
I’m glad you asked! At present, I’m unaware of any other issues, however my plan is to expand the demo in the future if any others come to light. If you are aware of any that are not related to what I’ve already covered, please let me know in the comments.
The demo code for this article can be found in the KastriFree project, here.
3. Request permission for sending SMS
Let us fix that by going to AndroidManifest.xml and adding the necessary request:
says that our application needs this particular permission, which is defined by the framework (hence the android prefix).
Additionally, go to the /app/build.gradle file, and temporarily set targetSdkVersion to 22 (anything below 23 will do). This is to show a very important change that recently happened to the Android Permission system.
Sync the project, run it and try sending an SMS. You might get an error upon sending in the application on the emulator/device — accept the suggestion and let it reinstall. It should not crash anymore. Of course, you are not going to send an actual message to provided number — this is all emulated.
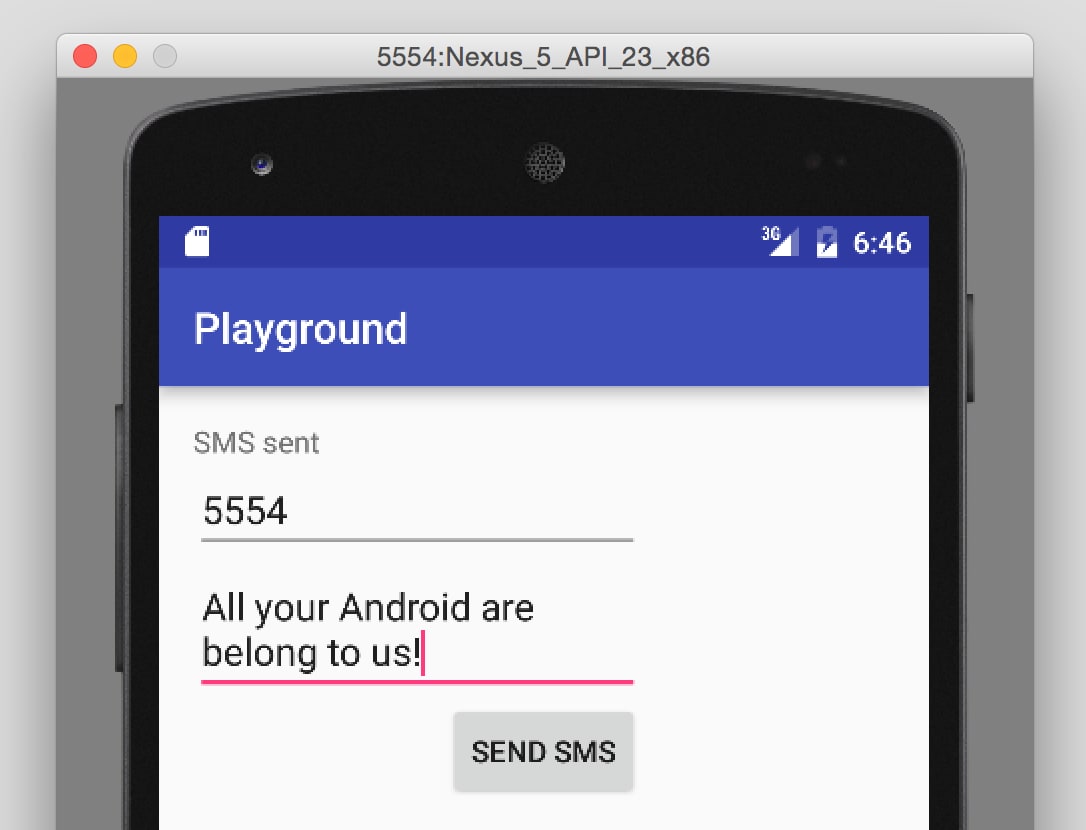
See if it really works by sending a message to the emulator itself. Its phone number is equal to the port on which it listens for connections — it is displayed in the title of emulator window, and by default, it is 5554. Go to the messaging app on the emulator and see if it has been received.

Android Working with Runtime Permission
Every Android application is started in its own process thus are isolated from all other applications (even from system/default applications). As a result, an Android application can’t access any file or data outside its scope until and unless the file or data is shared with the application.
So, the conclusion is that if an application needs anything outside its scope, then it has to request the appropriate permission.
Get Github code from HERE.
Android Runtime Permissions
- Runtime permissions are a new feature in Android 6.0 Marshmallow that allow you to request permissions at runtime, when it matters rather than at install time.
- This will give the user to have more control over the permissions and ensure more security for his/her confidential data.
- In the case we try to call some function that requires a permission which user has not granted yet, the function will suddenly throw an Exception (java.lang.SecurityException) that will lead to the application crashing. Hence we need to implement this new android permissions model in our application.
Permission Types
Permissions are divided into several protection levels. The two most important protection levels are normal and dangerous permissions.
- Normal Permissions
- Dangerous Permissions
Normal Permissions : Permissions that have very little or no effect on user’s privacy or confidential data are categorized as normal permissions. The system itself grants normal permissions when requested instead of prompting to the user. Examples would be ACCESS_WIFI_STATE, WAKE_LOCK, INTERNET , etc.
Dangerous Permissions : Permissions that may have a greater effect on user’s privacy or confidential data are categorized as dangerous permissions. Examples would be READ_CONTACTS, ACCESS_FINE_LOCATION, CAMERA , etc. If an app requests dangerous permissions then the user has to explicitly grant permission to the app.
Here is the detailed information about permissions.
Permission Workflow before and from M (API 23)
The permission workflow has been changed from Android Marshmallow(API 23). The way Android asks the user to grant dangerous permissions depends on the version of Android running on the user’s device, and the system version targeted by your app.
Permission Model before M (API 23):
- Before API 23, the permission model was simpler to the developer but offered less control and security to the user.
- If the device is running Android 5.1.1 (API level 22) or lower, or the app’s targetSdkVersion is 22 or lower while running on any version of Android, the system automatically asks the user to grant all dangerous permissions for your app at install-time.
Install-time permission dialog
- If the user clicks Accept , all permissions the app requests are granted. If the user denies the permissions request, the system cancels the installation of the app.
- Permissions cannot be denied or granted after the installation.
- Thus developers were required only to declare all needed permissions in the manifest and then just forget, if the app is running then it has all the requested permissions.
Permission Model from M (API 23):
- With Android 6.0 Marshmallow (API 23), a new runtime permission model has been introduced.
- According to this model if the device is running Android 6.0 (API level 23) or higher, and the app’s targetSdkVersion is 23 or higher, the user isn’t notified of any app permissions at install time.
- Your app must ask the user to grant the dangerous permissions at runtime before performing any action that may require the particular permission.
- When your app requests permission, the user sees a system dialog which includes a Deny and Allow button.
- If the user denies the permission request, the next time your app requests the permission, the dialog contains a checkbox that, when checked, indicates the user doesn’t want to be prompted for the permission again.
Note: According to Google, beginning with Android 6.0 (API level 23), users can revoke permissions from any app at any time, even if the app targets a lower API level.
Check for permission
If your app needs a dangerous permission, then you must check whether you have that permission or not every time when the app performs an operation that requires that permission.
For example , if your app uses the camera feature, then you have to check for the camera permission every time when app opens the camera.
To check if you have a permission, call the checkSelfPermission() method. For example, this snippet shows how to check if the activity has permission to access the camera and location:
If the app has permission, then the method returns packageManager.PERMISSION_GRANTED (ie. 0) and the app can continue with the operation.
If the app does not have permission, then the method returns packageManager.PERMISSION_DENIED (ie. -1) and the app have to explicitly ask the user for permission.
Explain why the app needs permissions
In some circumstances, you want to help the user understand why your app needs a permission.
For example , if you write a camera app, requesting the camera permission would be expected by the user and no rationale for why it is requested is needed. If however, the app needs location for tagging photos then a non-tech savvy user may wonder how location is related to taking photos. In this case, you may choose to show UI with rationale of requesting this permission.
Android provides a utility method, shouldShowRequestPermissionRationale() , that returns true if the user has previously denied the request, and returns false if a user has denied a permission and selected the Don’t ask again option in the permission request dialog, or if a device policy prohibits the permission.
Request and Handle Runtime permission
When your app receives PERMISSION_DENIED from checkSelfPermission() , you need to prompt the user for that permission. To request the permissions Android provides a method called requestPermissions() to request array of permissions to be granted to the application and these permissions must be requested in your manifest. Calling these methods brings up a standard Android dialog, which you cannot customize. When the user responds to your app’s permission request, the system invokes your app’s onRequestPermissionsResult() method, passing it the user response.
Request runtime permission
- If your app doesn’t already have the permission it needs, the app must call one of the requestPermissions() methods to request the appropriate permissions.
- Your app passes the permissions it wants and an integer request code that you specify to identify this permission request.
- This method functions asynchronously. It returns right away, and after the user responds to the prompt.
- The system calls the app’s callback method onRequestPermissionsResult() with the results, passing the same request code that the app passed to requestPermissions() .
The following code checks if the app has permission to access CAMERA . If it does not have permission it checks if it should show an explanation for needing the permission, and if no explanation is needed, it requests the permission:
Handle the permissions request response
- When the user responds to your app’s permission request, the system invokes your app’s onRequestPermissionsResult() method, passing it the user response. Your app has to override that method to find out whether the permission was granted. The callback is passed the same request code you passed to requestPermissions() .
For example, if an app requests CAMERA and LOCATION access it might have the following callback method:
- If the user denies a permission request, your app should take appropriate action. For example, your app might show a dialog explaining why it could not perform the user’s requested action that needs that permission.
- When the system asks the user to grant a permission, the user has the option of telling the system not to ask for that permission again. In that case, any time an app uses requestPermissions() to ask for that permission again, the system immediately denies the request.
Understand the workflow of runtime permission request
- When the app asks for dangerous permission for the first time, then the system shows a standard non-customizable dialog that specifies the permission features.
- If the user denies permission and the app tries to access the same permission again then it is a good programming practice to show an explanation to the user that why the app needs that permission. This is not a system dialog but showing explanation is the responsibility of the user.
- If a previously denied permission request again, then the system shows a standard dialog with an additional checkbox (Don’t ask again) .
- If the user selects the checkbox(Don’t ask again) then the system will never show that permission dialog again.
- If the user selects the checkbox(Don’t ask again) and denies the permission for the second time then it is a good programming practice to lead the user to the permission page in app settings to grant the denied permissions.
So now let us start with creating a sample app.
Creating Android Project
1. Create a new project in Android Studio from File ⇒ New Project and fill the project details.
2. Open build.gradle (app level) and make sure that you have set minSdkVersion and targetSdkVersion as we have to support the permissions model in lower versions also. I am keeping minSdkVersion to 17 and targetSdkVersion to 28.
build.gradle
3. Though we will request the permissions at runtime, we should add it to the Manifest also. We will start with the CAMERA and ACCESS_FINE_LOCATION permissions. Add these permissions to your AndroidManifest.xml just before the application tag.
AndroidManifest.xml
4. Open the layout file of main activity (activity_main.xml) and add the below xml. This layout contains two buttons ie. CHECK PERMISSION to check the permission and REQUEST PERMISSION to request the permissions.
activity_main.xml
The above layout generates a screen something like this.
Targeting Android 8 and higher, continued
As per the last article, this article and demo was produced using Delphi Tokyo 10.2.3. The code may or may not work with earlier versions. NOTE: If you’re using Delphi 10.3 or higher, you should use the built-in support for permissions and external URIs.
UPDATE (July 20th, 2018): The demo has been modified to allow for a workaround for local notifications when targeting API 26 or greater. See below for details.
TL;DR: The demo code for this article can be found in the KastriFree project, here.
Targeting an API level
There has been some confusion over what “targeting” a particular API level means. It does not mean which Android SDK you have configured in the SDK Manager in the Delphi IDE. It means what value is set for the targetSdkVersion value in the application manifest:
This is the API level at which Android will act in “compatibility mode” for. By default, Delphi sets this value to 14 (Android 4.0). The device can still have a later version of Android installed, and your application can still use API calls that apply for the installed version, however it will act as if it were at the target level. For example, an app targeting API level 14 on a device running Android 6 will not require requesting permissions at runtime.
At present, to target a particular API level, you need to manually modify the AndroidManifest.template.xml file, as described in the previous article.
A change in the method for responding to runtime permission requests
In the previous article, I devised a method of requesting permissions at runtime that required “overriding” FMXNativeActivity in the manifest. Unfortunately, that meant having to launch the application from the device manually in order to debug via the IDE. Thanks to a suggestion from Stephane Vanderclock, author of the Alcinoe library, I’ve devised a different method that removes the need to “override” the activity.
Through necessity (which will become clearer later), I have created a new class called TPermissionsRequester, which more accurately reflects what it does anyway. This replaces the TSystemHelper class, which I recommend you stop using altogether, if you choose to change to using this new solution.
When a runtime permissions request is made, the focus moves away from the application, and once the user has granted or denied permission, the application receives focus again, and the BecameActive event fires. TPermissionsRequester handles this event, and if a permissions request has been made, checks whether such permissions were granted:
So all the developer needs to be concerned with is requesting the actual permissions, and handling the OnPermissionsResult event:
As TPlatformPermissionsRequester (in DW.PermissionsRequester.Android) uses TApplicationEventMessage which comes from the FMX.Platform unit, it cannot be used in a service (at least at present). That’s why TPermissonsRequester was created, and CheckPermission method has been moved to TOSDevice, so that it can be used in a service.
Note that in this demo, permissions are requested only when absolutely required (i.e. when the user wants to take a photo). This makes the application a little more user friendly than if the permissions were requested as soon as the application starts.
In the code, I am passing the string representation of the permission, e.g.
The format for all of the “dangerous” permissions is the same, i.e. it follows the pattern: android.permission.XXXX, where XXXX is one of the “Permissions” values in this list, so you can define your own values to be passed to the RequestPermissions method in the same manner.
Note that even though you’re requesting permissions at runtime, you still need to check the checkboxes for those permissions in the Uses Permissions section of the Project Options
Accessing “external” URIs
If you have tried to target API 26, and attempted to use the TTakePhotoFromCameraAction, you would have noticed that it fails, with the error:
android.os.FileUriExposedException: file:///storage/emulated/0/test.txt exposed beyond app through Intent.getData()
From Android 7.0 (API level 24), when accessing “external” URIs, it is necessary to use the FileProvider class. Unfortunately, the code that causes the problem for TTakePhotoFromCameraAction is actually within the Java binaries (FMX.jar) that Delphi uses, so rather than expect developers to patch and recompile FMX.jar, I’ve come up with an alternative solution.
TMediaLibrary is an alternative for (at least for the present), TTakePhotoFromCameraAction. I may or may not expand on it, depending on how useful it becomes, and how Embarcadero handle the required changes. It has a single method: TakePhoto, and has event handlers for when the image is captured successfully, or when the user canceled.
Also it is currently useful only on Android, as there are no implementations for the other platforms.
TMediaLibrary makes use of a function from the newly created unit DW.Android.Helpers, called UriFromFile. This method checks what the targetSdkVersion value is, and if >= 24 it uses the FileProvider class to create a Uri from the file reference, passing in the “authority” which needs to be specified in the manifest. This is done by adding a Provider section, like this:
When using the UriFromFile function, the value specified in the manifest for android:authorities will need to match the application’s package name. This value appears in the Project Options under Version Info.
Note the entry: . This is a reference to a file that needs to be deployed with the application, called (in this case): provider_paths.xml. This is what the file looks like:
This file needs to be added to the application’s deployment using Deployment Manager, and the Remote Path value set to: resxml
Remember that when targeting API level 24 or greater, your app will need to request the appropriate permissions at runtime (as per the demo), before attempting to use the TakePhoto method. I had considered making TMediaLibrary handle all this automatically; perhaps in the future You should also remember that there are a number of other “dangerous” permissions that may be used throughout Delphi (e.g. by TLocationSensor). Be sure to request permissions at runtime for any of those that require it, before you attempt to use them.
Remember also that the UriFromFile function can be used in your own code if your app needs to access “external” files. You will certainly know this is the case if your application throws the dreaded FileUriExposedException.
Taking care of the status bar
In the previous article, it had slipped past me that when changing the API target, the status bar was no longer visible!
In this demo, the workaround was to change the Fill property of the form, setting the Color to Null, and the Kind to Solid. In addition, a Rectangle is added to the form, the Align property set to Contents, and the Color property of Fill set to Whitesmoke. Now the status bar is visible again, however remember that this is just a workaround; hopefully an official solution will present itself in the next update.
Getting notified..
The demo has been updated (July 20th, 2018) to allow for a workaround for local notifications. In order for them to work however, you will need to patch the System.Android.Notification unit from the Delphi source. Details on how to do this are in the readme. Also, you will need to use new files added to KastriFree, namely:
Note also in the demo that the original android-support-v4.dex.jar is disabled. This is because the demo uses a newer version of the Android support libraries:
Are there other issues that need to be accounted for when targeting later API levels?
I’m glad you asked! At present, I’m unaware of any other issues, however my plan is to expand the demo in the future if any others come to light. If you are aware of any that are not related to what I’ve already covered, please let me know in the comments.
The demo code for this article can be found in the KastriFree project, here.
Now you have an idea about the Android permission, let’s see how to ask for the permission in Android.
To ask for permission in Android you have to follow two steps:
1. You have to add those permissions requests in project -> app -> src -> AndroidManifest.xml file.
For Example, if we want to ask for the Camera Permission we have to add the following permission request in AndroidManifest.xml
After adding the permission in AndroidManifest file, this permission will be automatically asked by the play store when they install the app and this permission will be granted to the applications.
On devices before SDK version 23, the permissions are automatically granted if we add those permissions in our Androidmanifest.xml file but after SDK version 23 you have to ask runtime permission as well. If you are targeting the Android version dangerous permissions in run time (You don’t have to ask for all the permission just some permission which are called dangerous permissions, you can see the list below).
According to the official docs, dangerous permissions require a dialog prompt.
So whenever you are working with this dangerous permissions you need to check whether the permission is granted by the user or not and that can be done with the help of PermissionsAndroid in React Native.
For example, If we need INTERNET permission and CAMERA permission then we have to add both the permission in AndroidManifest.xml file but have to ask only for the CAMERA permission in run time because CAMERA permission comes under the dangerous permission not INTERNET permission.
Here is the list of dangerous permissions.
What’s Next?
Although this article explains very well about Runtime Permissions, it’s still very tedious task implementing permissions and its needs lot of code. If you want to quickly add runtime permissions, consider using Dexter library.

Rivu Chakraborty is a Sr. Tech. Member of Institution of Engineers(India), Diploma holder Engineer in Computer Science. He is presently at MaxMobility Pvt. Ltd. as a Sr. Software Engineer (Android)
![List of Android permissions normal permissions and dangerous permissions in API 23? [duplicate]](/wp-content/cache/thumb/88/b3761a2be847588_320x200.png)
